Hanging plants from the ceiling without drilling protects your security deposit while letting you make full use of vertical space in rental homes and apartments. The challenge isn't whether you can skip the drill - it's choosing a method that safely supports your plant's weight without damaging walls or ceilings when you move out.
Three approaches dominate the no-drill category: adhesive hooks that bond directly to smooth surfaces, tension rods that wedge between walls or door frames, and ceiling fixtures you already have in place, like curtain tracks or light fittings. Each method handles different weight loads and ceiling types, so matching the system to your specific plant and rental situation determines whether it works or fails.
Most no-drill hanging solutions cost between $9 and $19, making them affordable compared to professional installation or forfeited deposits. Weight capacity is the single most important spec to verify - adhesive hooks typically hold 2 to 10 pounds depending on surface prep and cure time, while tension systems can support 15 pounds or more when properly installed. A trailing pothos in a plastic nursery pot might weigh under 3 pounds; a large fern in a ceramic planter can easily exceed 8 pounds once watered.
The right choice depends on your ceiling material, the plant's total weight including soil and water, and how permanent you want the setup to feel. Understanding these tradeoffs before you buy keeps plants secure and walls intact through your entire lease.
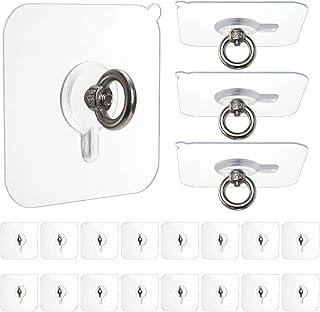
Suwimut 20 Pack Heavy Duty Adhesive Ceiling Hooks
When you need to hang multiple plants across a room or want enough hooks to experiment with placement, the Suwimut 20 Pack Heavy Duty Adhesive Ceiling Hooks delivers quantity at a practical price point. At $13.99 for 20 hooks, this pack brings the per-hook cost down to roughly the listed amount, making it one of the more budget-friendly options if you're planning a full ceiling plant display or splitting the pack with roommates.
The 4.6 out of 5 rating reflects consistent performance across the set. With 20 hooks in hand, you can test adhesive placement on different ceiling surfaces - smooth paint, textured zones, or near corners - without worrying about running out. This flexibility matters in rental spaces where you might need to reposition a hook once or twice before finding the spot that holds securely and looks right.
Because you're buying in bulk, you also gain the freedom to dedicate hooks to lighter plants in one room and reserve others for heavier pots elsewhere, as long as each hook stays within its stated weight capacity. Check the product page for the exact load limit per hook before hanging; adhesive strength varies by ceiling texture and temperature, so knowing the manufacturer's spec helps you avoid overloading.
This pack size works well if you're setting up a plant corner with trailing pothos, small ferns, or succulent hangers spread across several ceiling points. The cost-per-hook advantage means you can commit to a uniform look without a steep upfront investment, and any unused hooks become spares for future rearrangements or replacements if one loses adhesion over time.
- ✅ 20-hook pack reduces per-hook cost to around $0.70
- ✅ Enough quantity to test placement and spread plants across multiple ceiling points
- ✅ 4.6 out of 5 rating across the set
- ✅ Spare hooks available for repositioning or future use
- ⚠️ Weight capacity per hook must be verified on the product page
- ⚠️ Adhesive performance depends on ceiling texture and temperature
- ⚠️ Bulk pack may be more than needed for single-plant setups
Who This Solution Is For
This no-drill approach works best for renters who need to protect their security deposit, students in temporary housing, or anyone who wants to try out plant placement before making permanent changes to their ceiling. If you don't own a drill, feel uncomfortable using power tools, or simply want the flexibility to rearrange your hanging garden without patching holes, these methods let you hang lightweight to medium-weight plants safely and reversibly.
Ceiling material matters. Smooth, painted drywall or plaster ceilings offer the most reliable surface for adhesive hooks and tension systems. Popcorn texture, heavily textured knockdown finishes, and rough plaster reduce adhesive contact area and grip strength, which limits your options to tension rods installed between walls or ceiling-mounted track systems that don't rely on direct ceiling adhesion. If your ceiling has been recently painted, wait at least two weeks for the paint to fully cure before applying any adhesive product to avoid peeling.
Weight capacity is the other deciding factor. Most adhesive hooks and command-style mounts handle plants up to 3 - 5 pounds per hook when installed correctly on compatible surfaces. Heavier plants - ceramic pots over 8 inches, mature pothos or philodendrons in soil - require tension rods anchored wall-to-wall or adhesive systems rated specifically for higher loads. Always check the manufacturer's weight limit and match it to your plant's total weight, including pot, soil, water, and hardware.
The key takeaway: this guide is designed for people prioritizing flexibility and surface protection over maximum load capacity, with realistic expectations tied to ceiling texture and plant size.
Ginmino 10 Pack No Drill Adhesive Ceiling Hooks
The Ginmino 10 Pack No Drill Adhesive Ceiling Hooks offers a middle-ground option at $18.99, working out to approximately the listed amount per hook. This pack size suits renters who want to create a dedicated plant corner or hang a small to medium collection without committing to bulk quantities.
With a 4.5 out of 5 rating, the Ginmino hooks show consistent performance across user feedback. The 10-hook count gives you enough flexibility to group several lightweight plants in one area or spread hooks across a room while keeping initial investment moderate. This quantity works well if you're testing adhesive ceiling hooks for the first time or already know how many plants you plan to hang.
Compared to larger packs, the Ginmino set costs more per hook but requires less upfront spending and storage space. The price point sits between single-hook emergency purchases and contractor-style bulk packs. Before mounting, confirm your ceiling surface is clean, smooth, and compatible with the adhesive type included - most adhesive hooks work best on painted drywall, smooth plaster, or sealed wood rather than textured or porous surfaces.
This pack gives you room to experiment with plant placement and adjust your layout as your collection grows, without the waste of buying more hooks than you'll use in the near term.
- ✅ Mid-size pack balances cost and quantity
- ✅ 4.5 rating indicates reliable performance
- ✅ Good for small to medium plant collections
- ✅ Less upfront cost than bulk options
- ⚠️ Higher per-hook cost than larger packs
- ⚠️ May need to verify adhesive compatibility with ceiling type
What You Need to Know Before You Hang
- Weigh your plant with pot and soil while wet
- Check ceiling surface is smooth, clean, and painted
- Measure distance from ceiling to desired plant height
- Confirm adequate natural light reaches the hanging spot
- Allow 24-hour cure time for adhesive before hanging weight
- Keep backup command strips or hooks on hand
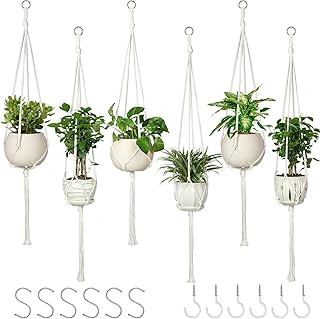
AOMGD 6 Pack Macrame Plant Hanger for Indoor Outdoor Plants
The AOMGD 6 Pack Macrame Plant Hanger delivers a complete hanging solution at $13.52 for six hangers, making it an affordable way to suspend multiple plants without drilling. Each hanger works with adhesive hooks, tension rods, or existing ceiling fixtures, giving you flexibility whether you're in a rental or prefer no-damage installation. The macrame design supports indoor and outdoor plants, and the hangers are adjustable to accommodate different pot sizes and ceiling heights.
With a 4.7 out of 5 rating, this set stands out for reliability and value. The pack of six means you can create a cohesive plant display across a room or use them throughout your home without additional purchases. Because these are the hanger component only, you'll need to pair them with adhesive hooks or another mounting method from this guide if you don't already have fixtures in place.
The adjustable length feature helps you fine-tune the height of each plant, which is especially useful when working with varied ceiling heights or when you want to stagger plant levels for visual interest. Before purchasing, measure your ceiling height and confirm the hanger length range will position your plants at the desired height - this avoids the common issue of hangers that leave plants too high or too low after installation.
- ✅ Six hangers for $13.52 provides strong value for multiple plants
- ✅ 4.7 rating reflects consistent user satisfaction
- ✅ Adjustable length accommodates different ceiling heights and display preferences
- ✅ Works with adhesive hooks, tension rods, or existing fixtures
- ⚠️ Hooks sold separately if you don't have mounting hardware
- ⚠️ Length must be verified against your ceiling height before purchase
Method 1: Heavy-Duty Adhesive Ceiling Hooks
Heavy-duty adhesive ceiling hooks offer the most straightforward way to hang plants from the ceiling without drilling, using industrial-strength adhesive pads designed to bond directly to smooth, painted surfaces. These hooks typically support between 10 and 30 pounds depending on the brand and ceiling texture, making them suitable for small to medium hanging plants in pots up to 8 inches in diameter.
Installation requires a clean, dry ceiling surface free of dust or grease. Wipe the mounting area with rubbing alcohol, peel the protective backing from the adhesive pad, press the hook firmly against the ceiling for 30 seconds, then allow the bond to cure for 24 to 48 hours before hanging any weight. The curing period is essential - rushing this step significantly reduces holding power and increases the risk of the hook detaching unexpectedly.
Adhesive hooks work best on flat ceilings with latex or oil-based paint in good condition. Textured popcorn ceilings, fresh paint applied within the past 30 days, and porous surfaces like unsealed wood reduce adhesion and are not recommended. When properly installed on compatible surfaces, these hooks provide a semi-permanent hold that can last months or years without loosening.
The main tradeoff is removal: while most adhesive hooks are marketed as removable, peeling them off often pulls away paint or leaves sticky residue that requires solvents to clean. Some models include pull-tabs designed for cleaner removal, but there is always a risk of surface damage, especially on older or low-quality paint. If you rent or plan to move, test the adhesive on an inconspicuous spot first, and be prepared to touch up paint during removal. For renters prioritizing zero damage, other methods may be safer, but for homeowners seeking a strong, invisible mounting solution, adhesive ceiling hooks deliver reliable performance with minimal installation effort.
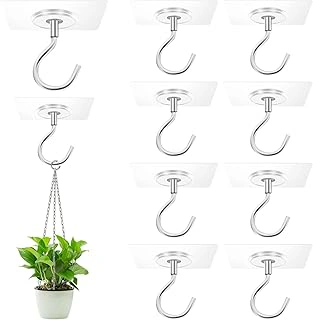
NINEFOX 4 Pack Heavy Duty 30lbs Adhesive Ceiling Hooks
If you're looking for an affordable way to test adhesive ceiling hooks before committing to a larger setup, the NINEFOX 4 Pack offers a budget-friendly entry point at $8.99. Each hook in this set is rated to hold up to the listed size, making them suitable for heavier individual plants if the adhesive bond is applied correctly to a clean, smooth ceiling surface.
This 4-pack gives you enough hooks to hang one or two plants and evaluate how well the adhesive method works in your space. the listed size weight rating per hook provides headroom for most potted plants, though you'll want to account for the combined weight of soil, water, pot, and plant when calculating whether a hook is appropriate for your setup.
With a 4.4 rating, the NINEFOX hooks have earned generally positive feedback, though it's worth reading through user reviews to confirm that the weight capacity holds up under real-world conditions similar to yours. Surface preparation - cleaning with rubbing alcohol and allowing the adhesive to cure for the recommended time - will affect performance significantly.
Because this is a smaller pack at a low price point, it's a practical choice for renters or anyone who wants to try the no-drill approach with minimal upfront investment. If the hooks perform well in your environment, you can scale up; if they don't bond reliably to your ceiling texture, you've risked less than multiple to find out.
- ✅ Budget-friendly at $8.99 for 4 hooks
- ✅ 30 lb weight rating per hook suits heavier plants
- ✅ Good starter pack for testing adhesive ceiling methods
- ⚠️ Smaller pack limits multi-plant arrangements
- ⚠️ Adhesive performance depends heavily on ceiling surface and prep
- ⚠️ User reviews should be checked for real-world weight capacity confirmation
Method 2: Macrame Hangers with Existing Fixtures
Macrame hangers attached to existing ceiling fixtures offer a no-drill solution when you already have sturdy anchor points like light fixture bases, curtain rod brackets, or exposed beams. This method works best for lightweight plants - typically under 5 pounds - and requires fixtures rated to handle the additional load without stress. If your ceiling light base or bracket is securely fastened and not purely decorative, you can loop a macrame hanger around it to suspend trailing pothos, string of pearls, or small ferns without creating new holes.
The key limitation is availability: renters without accessible fixtures or those with recessed lighting cannot use this approach. Weight capacity also matters - older light fixtures or thin decorative brackets may loosen over time if loaded beyond their original design. Before hanging, confirm the fixture is firmly attached to a junction box or structural element, not just drywall. For plants heavier than a few pounds, this method becomes risky and adhesive hooks or tension rods are safer alternatives.
Macrame hangers pair well with adhesive hooks when you need to position plants away from existing fixtures. You can install an adhesive hook on the ceiling, then hang the macrame from that hook to gain flexibility in placement while maintaining the aesthetic appeal of woven rope. This hybrid approach gives you control over location without requiring a fixture directly overhead, making it easier to group plants or fill empty corners. Choose natural cotton or jute macrame for a cohesive look, and ensure the hanger's loop or ring fits comfortably over your fixture or hook without forcing or bending the hardware.
Method 3: Tension Rods and Creative Workarounds
Tension rods offer a no-drill solution when you have doorways, window frames, or narrow wall gaps that can support a spring-loaded bar. Installed horizontally between two surfaces, these rods let you hang plants using S-hooks or clips, keeping greenery off the floor without touching the ceiling. The approach works best for lightweight pothos, small ferns, or trailing succulents, since most standard tension rods hold between five and twenty pounds depending on the span and rod diameter.
Doorways are the most common placement: position the rod high in the frame, just below the top trim, and adjust tension until the rod sits firmly. Check stability by tugging gently before adding plants. For wider openings or heavier loads, choose a rod with rubberized end caps and a thicker steel core. Keep in mind that tension rods rely on friction, so they shift more easily than wall-mounted hardware and need occasional adjustment, especially in high-traffic areas.
Over-the-door hooks normally face inward, but you can pair them with extension chains or swivel hooks to redirect plants upward and outward, creating a cascading effect near the doorframe. This method keeps the hook anchored to the door's top edge while the plant hangs in front of or beside the frame. Weight capacity depends on door thickness and hinge strength; keep individual planters under three pounds to avoid stressing the door.
Freestanding plant stands with tall frames or arched tops offer vertical space without any ceiling attachment. These structures sit on the floor and extend upward, providing hooks or bars at different heights. They work well in corners or beside furniture, though they occupy floor space and lack the true overhead look of ceiling-hung plants. Use them when wall geometry doesn't suit tension rods or when you want flexibility to rearrange plants frequently.
All three workarounds share a common limitation: they depend on room layout rather than ceiling structure. Tension rods need parallel surfaces within the right distance, over-the-door hooks require a suitable door, and freestanding stands need floor clearance. For rooms with open floor plans, vaulted ceilings, or no convenient doorways, adhesive ceiling hooks or command strips remain the more direct solution.
Common Mistakes That Lead to Falling Plants
Most plants fall not because the hardware failed, but because a critical installation step was skipped or a weight limit was ignored. Understanding these common mistakes - and how to avoid them - will keep your ceiling plants safely overhead.
Skipping the 24-hour cure time. Adhesive hooks reach full strength only after the bond has cured, typically 24 hours but sometimes longer depending on temperature and humidity. Hanging a plant immediately after pressing the hook onto the ceiling may feel secure at first, but the bond will fail under sustained weight. Wait the full cure period recommended on the package, even if the hook seems stuck.
Underestimating wet soil weight. A 6-inch pot filled with moist potting mix and a mature plant can weigh 8 to 12 pounds - double the dry weight. Many people select hooks rated for the pot alone, then discover the limit after watering. Always account for soil moisture, the plant itself, and the hanger when calculating total load.
Installing on dirty or textured ceilings. Dust, grease, and texture reduce the contact area between adhesive and surface. Wipe the ceiling with rubbing alcohol and let it dry completely before applying any hook. On heavily textured popcorn or stucco ceilings, adhesive hooks often lack enough flat surface to bond reliably; toggle anchors or ceiling-track systems are safer choices in those cases.
Exceeding stated weight limits. A hook rated for 5 pounds will not safely hold 7 pounds, even temporarily. Manufacturers set limits with a safety margin, but that margin disappears when soil gets wet, when multiple plants share one hook, or when the ceiling material is weaker than drywall. Treat the stated capacity as a hard ceiling, not a suggestion.
Using outdoor-only products indoors. Some suction hooks and certain adhesive strips are formulated for exterior temperatures and UV exposure, but their bonds can soften or creep in the stable warmth of an indoor room. Check the label to confirm the product is rated for interior use and the temperature range of your space.
Most failures trace back to rushed installation or mismatched hardware. By cleaning the surface, respecting cure times, calculating true weight, and staying within rated limits, you eliminate the vast majority of falling-plant incidents.
How to Remove Hooks Without Damaging Paint
Removing adhesive hooks without damaging paint requires patience and the right technique, especially if you're trying to protect a security deposit. Most adhesive damage happens during rushed removal, not from the months the hook spent on the wall.
Start by warming the adhesive with a hairdryer on medium heat for 30 to 45 seconds, holding it about six inches from the hook. The heat softens the bond and makes the adhesive more pliable. Pull the hook slowly at a downward angle - never straight out from the wall - using steady, even pressure. If you feel strong resistance, apply more heat rather than forcing it.
For stubborn hooks, slide a piece of dental floss or fishing line behind the adhesive pad and saw gently through the bond using a back-and-forth motion. This method takes longer but reduces the risk of pulling paint or drywall paper. Allow 10 to 15 minutes per hook if you're working carefully.
After removal, you'll likely see adhesive residue on the wall. Clean it with a small amount of rubbing alcohol on a soft cloth, using gentle circular motions. Let the area dry completely before inspecting for damage. If any paint lifted despite your care, a small dab of matching wall paint on a cotton swab can often hide minor blemishes before a final walkthrough.
The tools you need are simple: a hairdryer, dental floss or fishing line, rubbing alcohol, and a microfiber cloth. Keeping these on hand before installation day means you'll have an exit strategy ready when it's time to move or redecorate.
Choosing the Right Plants for Ceiling Hanging
Selecting plants suited to ceiling height improves both safety and plant health. Trailing varieties like pothos, string of pearls, philodendron, and spider plants naturally cascade downward, making them ideal choices for hanging displays. These plants tend to be more forgiving in lower or indirect light conditions common at ceiling level, especially in rooms with windows positioned lower on the wall.
Weight is a critical factor when hanging without drilling. Use lightweight plastic pots instead of ceramic or terracotta to reduce stress on adhesive hooks, tension rods, or ceiling-mounted hardware. A 6-inch plastic pot filled with standard potting mix typically weighs 2 - 4 pounds when watered, while the same size ceramic pot can exceed 6 - 8 pounds. Switching to a soilless mix with peat, coir, or perlite can cut soil weight by 20 - 30 percent without sacrificing drainage.
Consider the light environment at ceiling height before choosing your plant. Rooms with south- or west-facing windows often deliver bright indirect light near the ceiling, suitable for pothos, tradescantia, and peperomia. North-facing rooms or spaces farther from windows may only support low-light tolerant options like pothos or philodendron. Observe the ceiling area throughout the day to gauge how much natural light reaches that zone, then match your plant selection accordingly.
Trailing plants also simplify maintenance: their vines grow downward, so you can monitor leaf health and soil moisture without a step stool. Keep pot diameter and plant maturity in proportion to your hanger's weight rating, and repot into larger containers only when roots fill the current pot, ensuring you stay within safe load limits for adhesive or tension-based systems.
Final Verdict: What Works Best for Most Renters
For most renters with smooth ceilings, adhesive hooks paired with macrame or rope hangers offer the best balance of stability, ease, and deposit protection. This combination supports plants up to the hook's rated weight limit - typically 3 to 10 pounds per hook - without drilling, patching, or losing your security deposit. Tension rods work well as a supplement in doorways or between walls, but they can't replace ceiling-mounted options for creating true vertical green space throughout your apartment.
Weight capacity and cure time are non-negotiable. Always respect the manufacturer's weight rating and allow the full adhesive cure period - usually 24 hours - before hanging any plant. Skipping this step risks both plant damage and ceiling surface failure. If your ceiling texture is heavily stippled or porous, adhesive may not bond reliably; in that case, tension rods or freestanding plant stands become your primary options.
Start with one or two hooks to test your specific ceiling surface before committing to a full indoor garden. Hang a lightweight potted plant, wait 48 hours, and gently tug the hook to confirm the bond. This small-scale trial protects you from widespread adhesive failure and helps you fine-tune placement. Once you've confirmed the method works in your space, you can confidently expand your collection, knowing your walls - and your deposit - remain intact.